EV Features
If any of your vehicles is set to the EV fuel type (either as the primary or second tank), an EV tab appears in the app.
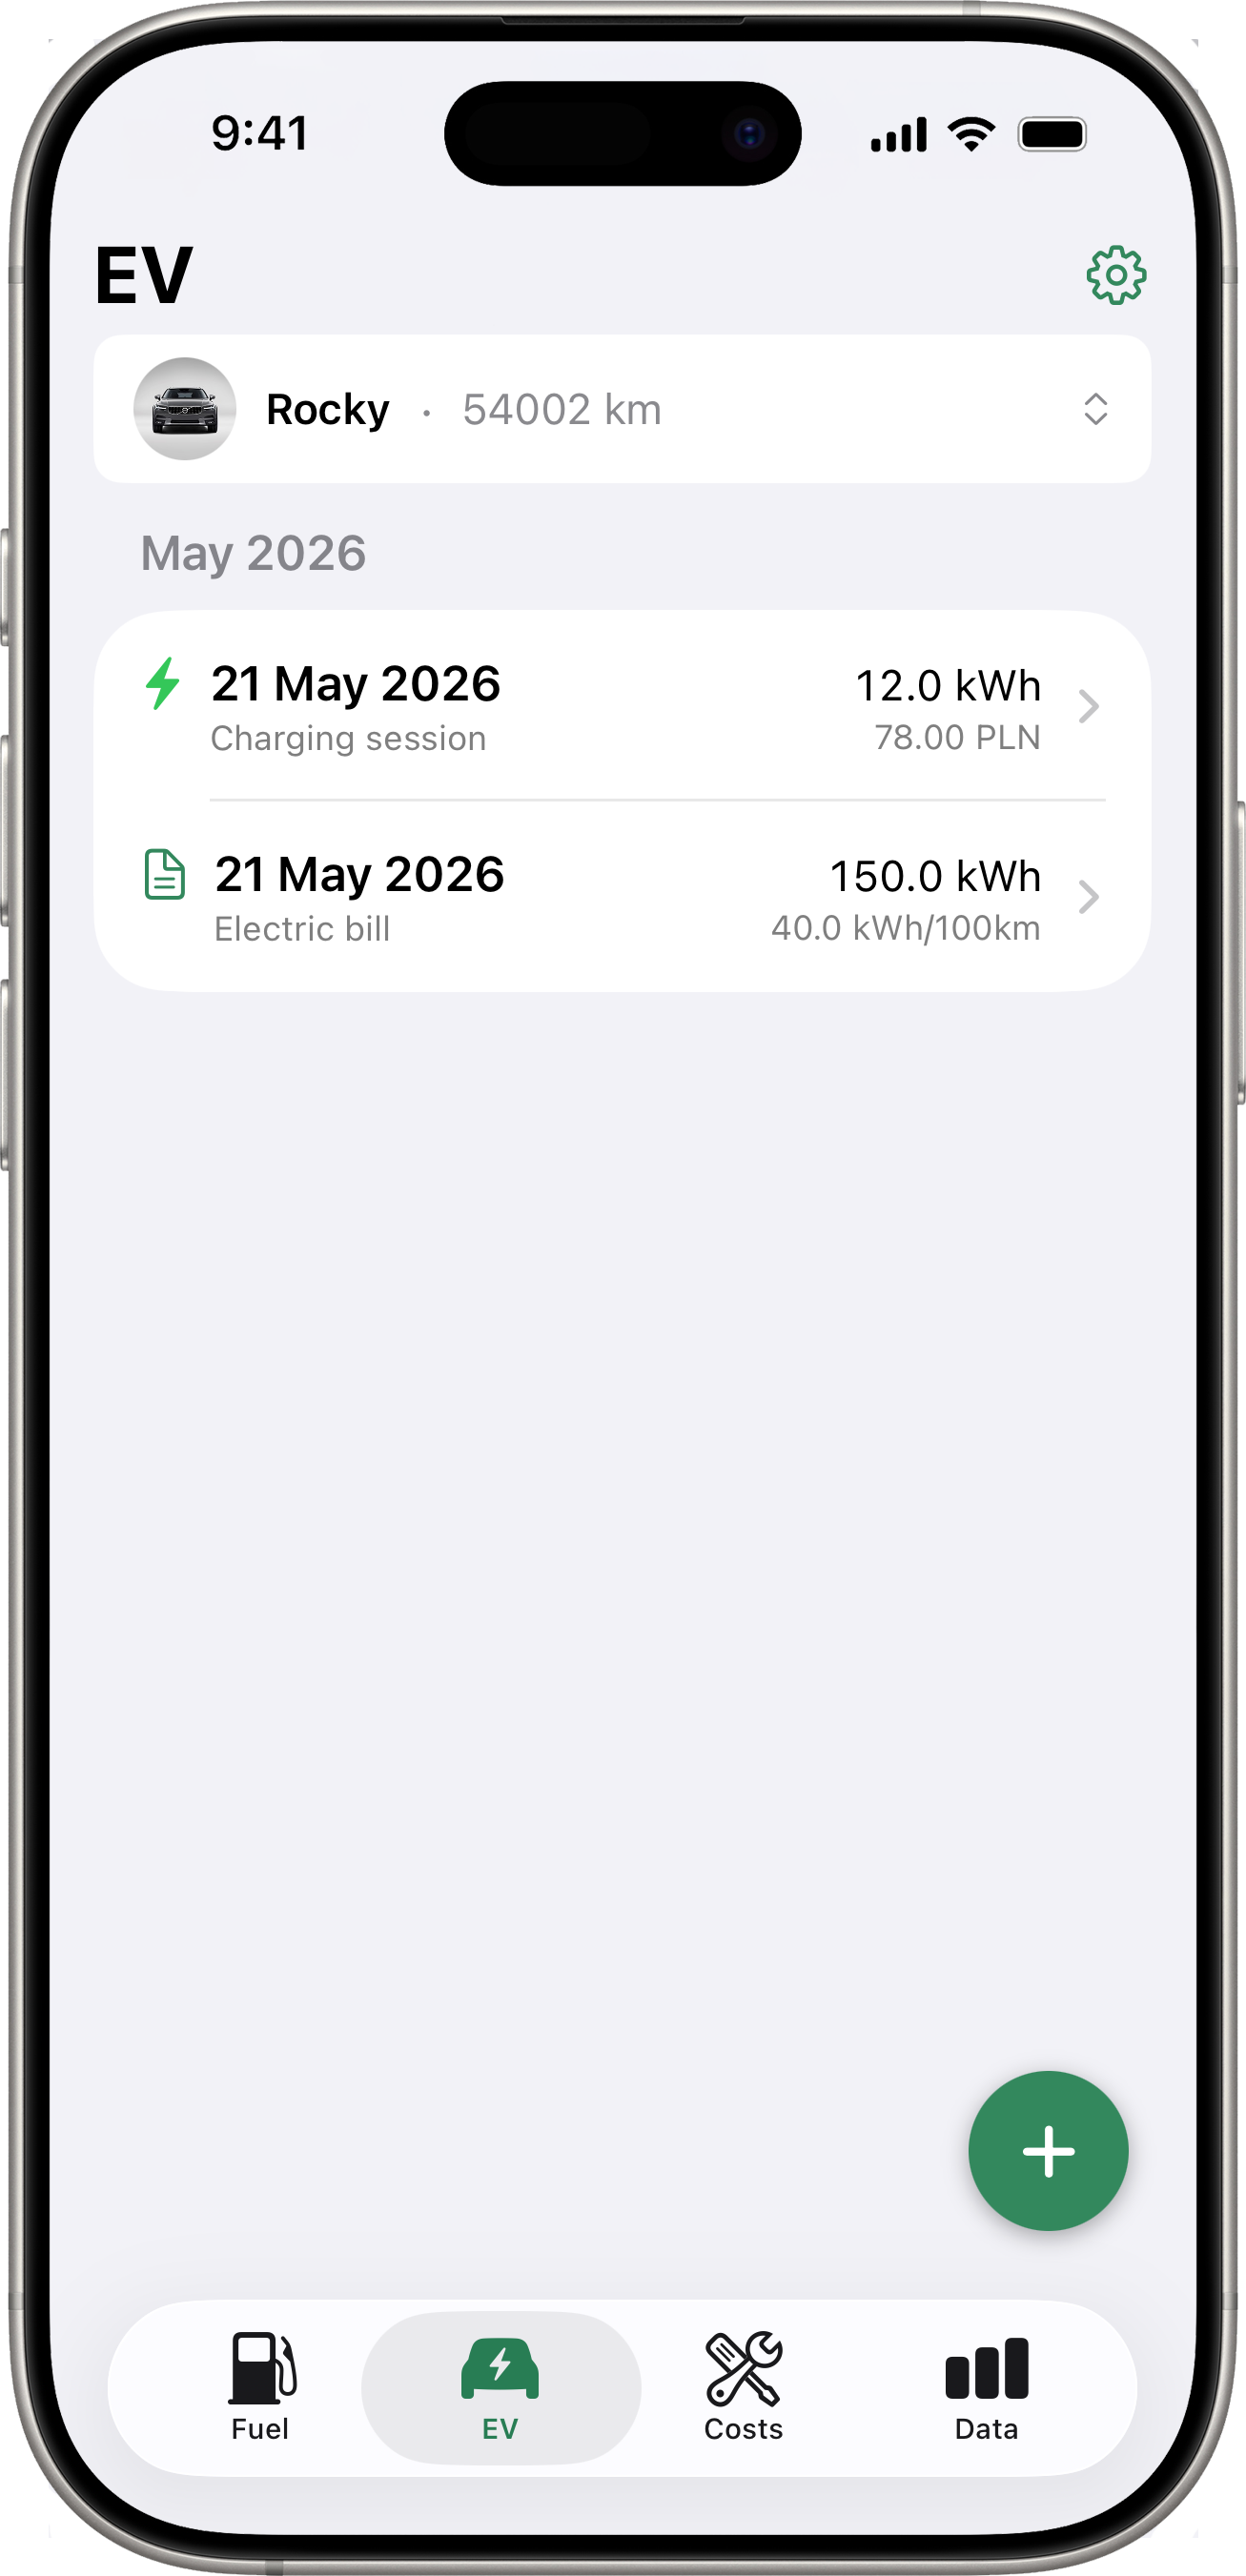
EV Tab Layout
The EV tab is a flat chronological history of two kinds of entries, newest first:
- ⚡ Charging sessions — single paid charging events at public chargers (Tesla Supercharger, Ionity, GreenWay, etc.). Each event has its own date, kWh, cost, and (optional) location.
- 🧾 Electricity bills — monthly home-charging accounting (start / end dates, kWh from meter, total cost).
No more “current period” card and no more separate session/bill lists — both kinds live in one unified timeline so you can browse what happened.
Adding entries — one button, two gestures
A single ➕ floating button is anchored at the bottom-right of the EV tab:
- Short tap → opens the Add Charging Session form.
- Long-press → opens the Add Electricity Bill form.
On first launch a contextual hint floats above the button explaining the two gestures: “Tap + for a charging session. Long-press + to add an electricity bill.” It dismisses itself once you use either gesture.
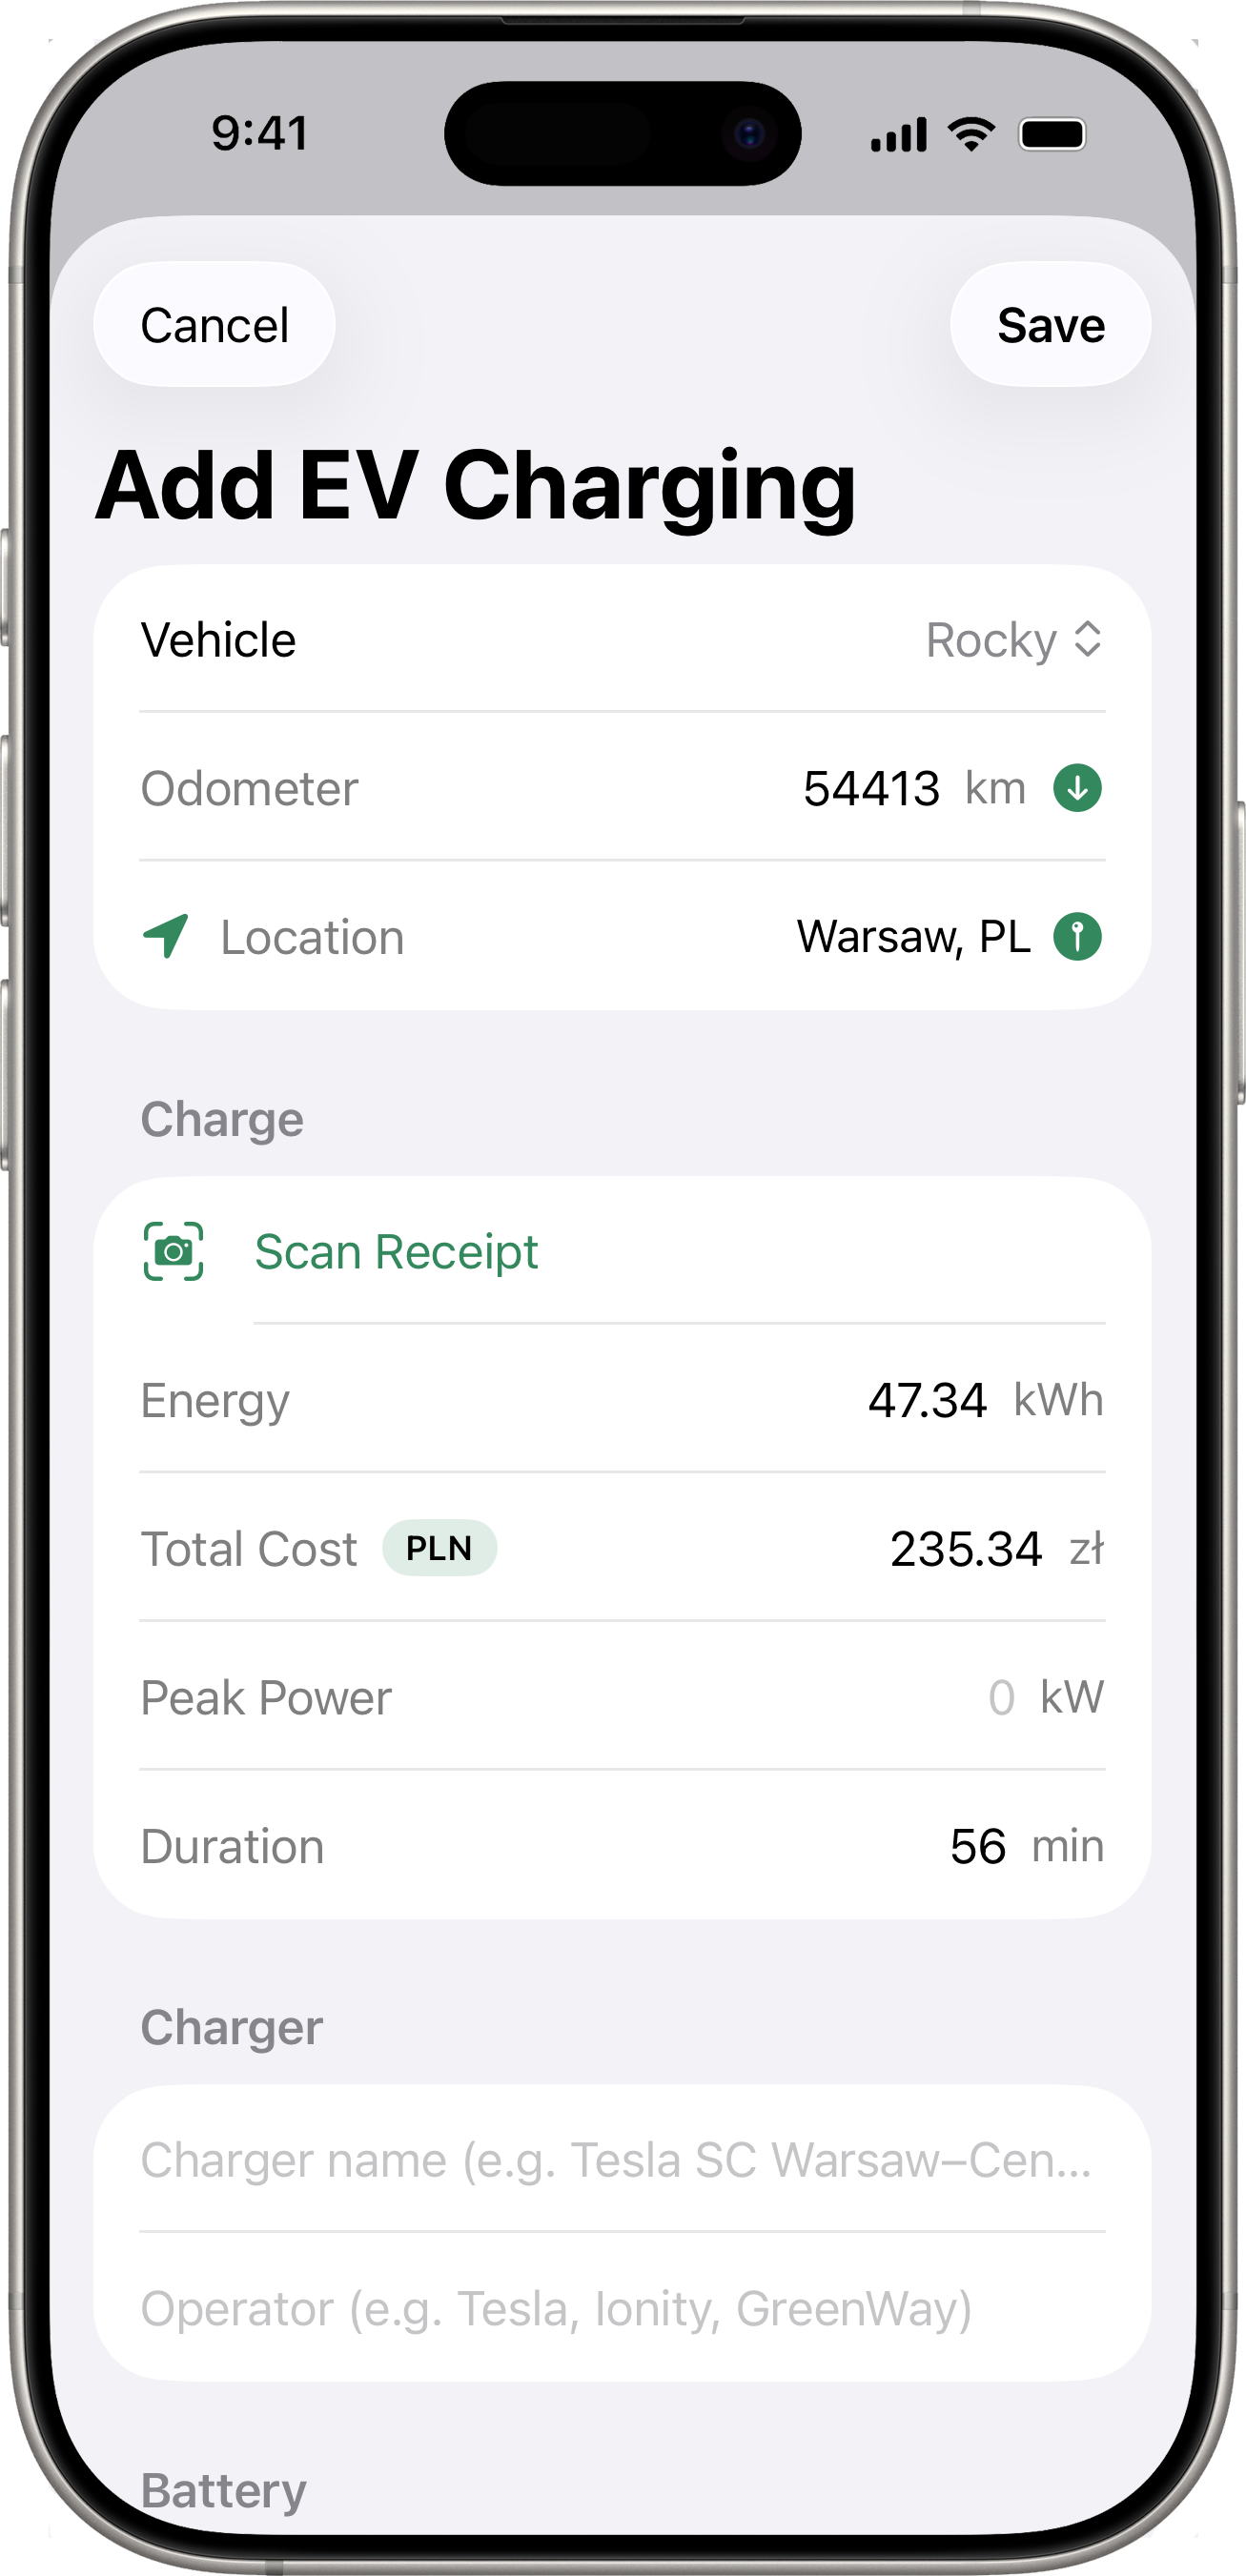
Adding a Charging Session
- Tap ➕ briefly.
- Fill in:
- Vehicle (multi-vehicle setups).
- Odometer — auto-fetched from the vehicle integration when available, otherwise typed.
- Location — same auto-capture row as on Fuel (with the toggle, refresh, long-press map picker).
- Date / Time.
- kWh added.
- Total cost (with currency selector if multiple currencies configured).
- Optional Charger network, Location name, Peak power (kW), Duration (minutes), Start SoC, End SoC, Note, Photos.
- Tap Save.
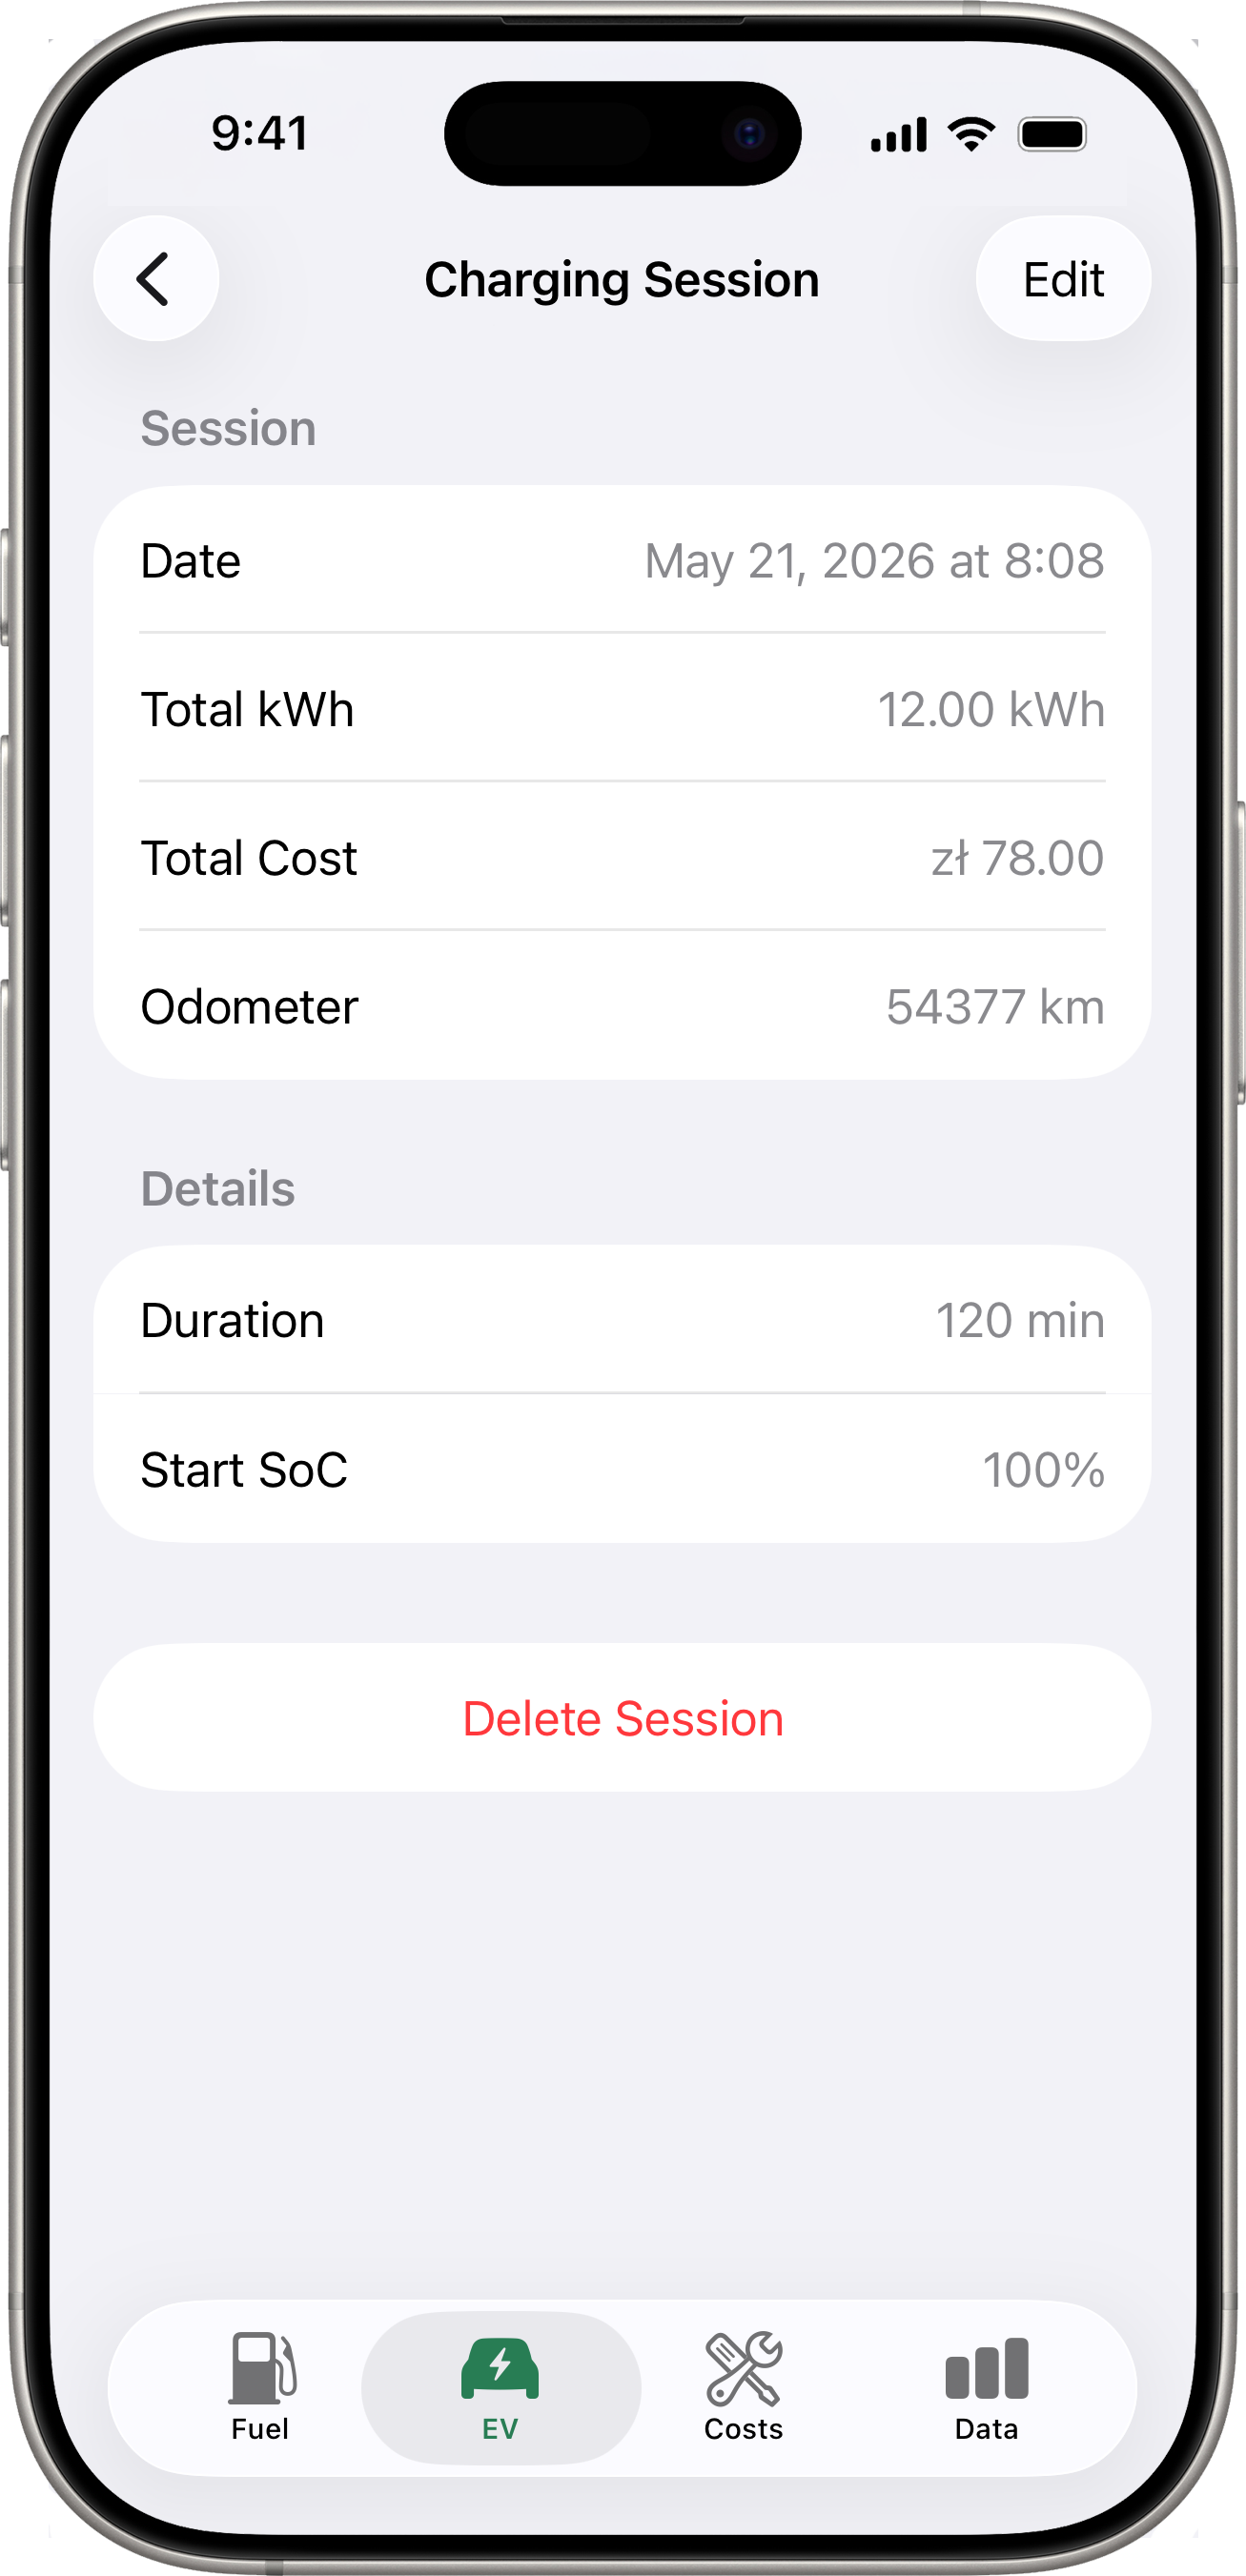
Charging Session Detail
Tap any session in the EV tab to open its detail view. It shows every field you entered (plus the geocoded location name if you captured GPS).
- Edit (toolbar, top-right) opens an editor with the same shape as the Add form. The Vehicle is locked (re-assigning a session to a different car is intentionally not supported here), but every other field — date, energy, total cost, peak power, duration, charger network, location name, start/end SoC, note, photos, location pin, exchange rate — is editable.
- Delete (bottom of the form) removes the session after a confirmation dialog.
Adding an Electricity Bill
- Long-press ➕.
- Fill in:
- Start — start date and, optionally, the Odometer reading on that date.
- End — end date and, optionally, the Odometer reading on that date.
- Electricity — Total kWh from Meter and Total Cost for the billing period.
- Tap Save.
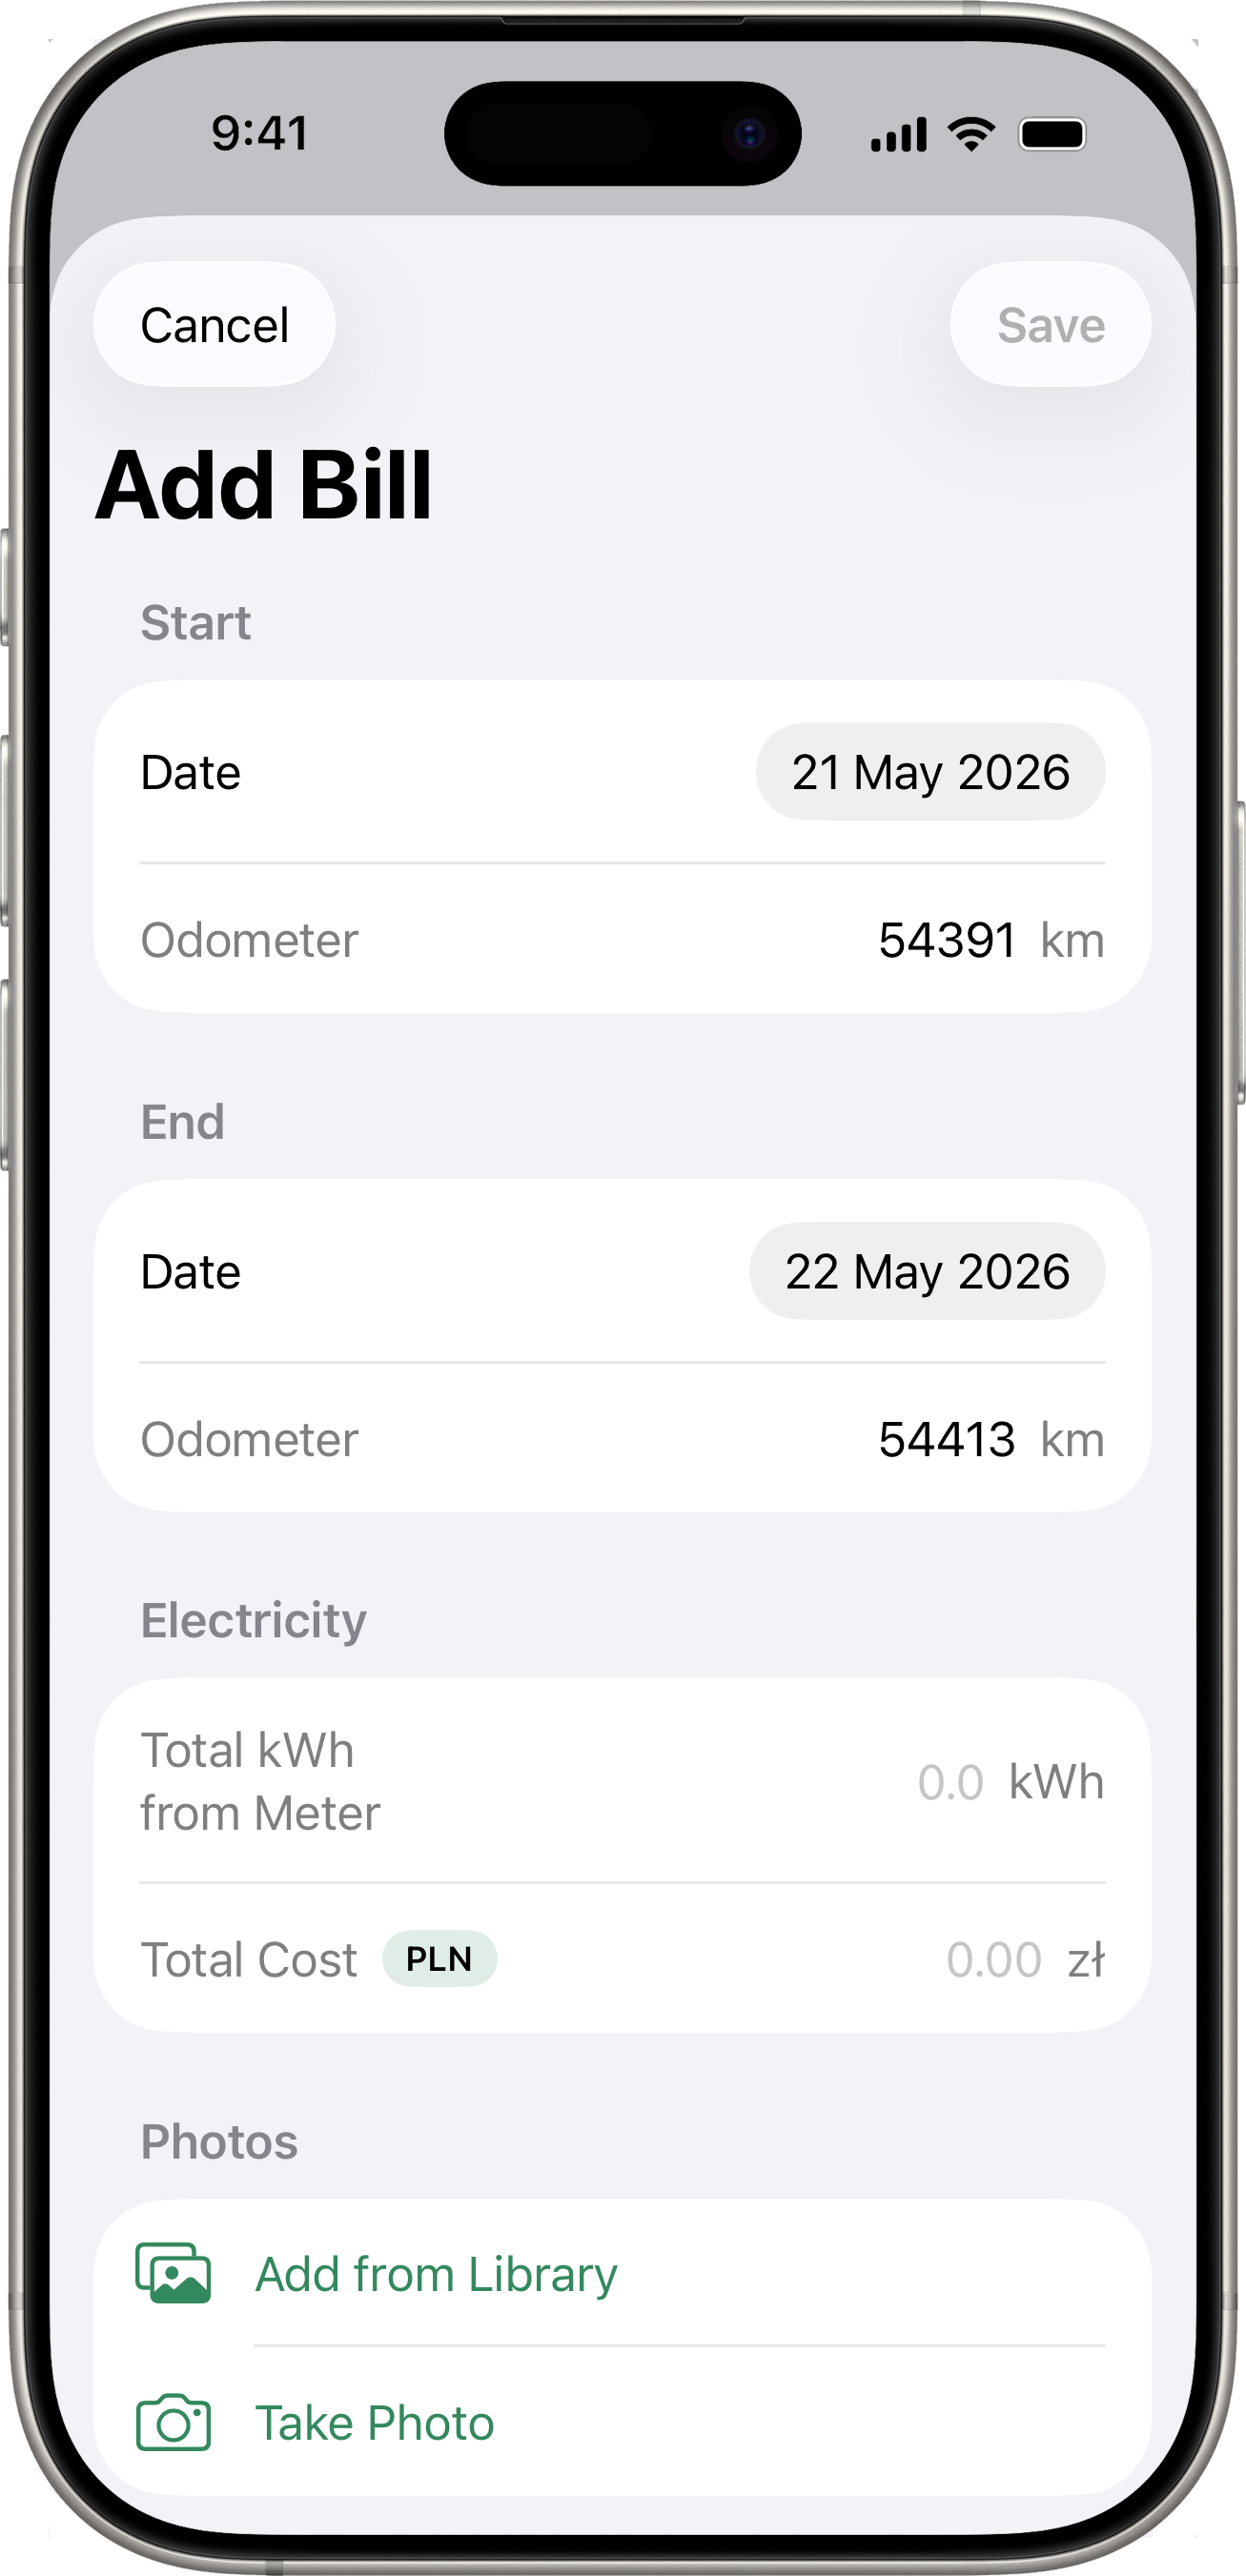
Odometer prefill
If a connected-service snapshot (Volvo or Toyota) was captured on the exact calendar day you select for Start or End, the matching Odometer field is filled in automatically using the vehicle’s distance unit. If no snapshot exists for that day, the field stays empty and you can type the reading yourself. Any value you type takes precedence and won’t be overwritten if you change the date afterwards.
How distance is calculated
When both Start and End odometers are filled in (manually or via prefill), the bill uses them directly to compute distance, kWh / 100 km, and cost per km. If either field is empty, the app falls back to its automatic snapshot reconciliation against the previous bill.
Latest Reading & Snapshot History
The Latest Reading card (odometer + battery + fuel, depending on what the integration returns) lives at the top of the Data tab for connected EV vehicles — not on the EV tab. The full history of every snapshot lives under Data → Readings. See Data → Latest Reading and Data → Readings.
EV Stats on the Data Tab
EV consumption and price-per-kWh trends are computed alongside fuel in the Data → Stats and Data → Charts screens. The Charts screen has dedicated Consumption, Cost/km, and Efficiency chart types for the dual-axis fuel + EV view. See Data.
Sync Failure Banner
If the app fails to sync odometer data from a connected service multiple times in a row, a warning banner appears at the top of the screen. Reconnect the integration from Settings > Integrations to resolve the issue.
Requirements
- At least one vehicle must have its fuel type set to EV (either as primary fuel type or as a second tank).